Introduction
First of all, Thank you so much for purchasing this theme. You are awesome! You are entitled to get free lifetime updates to this product + exceptional support from the author directly.
This documentation is to help you regarding each step of customization. Please go through the documentation carefully to understand how this template is made and how to edit this properly.
- Item Name : NanoFit – WP Theme for Personal Training Services
- Created: 2022
- Item Version : v 1.0.0
- Author : LineThemes
- Support Ticket: www.linethemes.ticksy.com
** If you like this theme, Please support us by rating us 5 stars
System Requirements
To use our themes, you must be running WordPress 4.8 or higher, PHP 5.6 or higher, and MySQL 5 or higher. Below is a list of items you should ensure your host can comply with.
- Check to ensure that your web host has the minimum requirements to run WordPress.
- Always make sure they are running the latest version of WordPress.
- You can download the latest release of WordPress from official WordPress website.
- Always create secure passwords for FTP and Database.
Hosting is more secure when PHP applications, like WordPress, are running using your account’s username instead of the server’s default shared username (www or www-data). The most common way for hosting companies to do this is using PHP. Just ask your potential host if they run PHP or something similar.
Recommended PHP Configuration Limits
Many issues that you may run into such as: white screen, demo content fails when importing, empty page content and other similar issues are all related to low PHP configuration limits. The solution is to increase the PHP limits. You can do this on your own, or contact your web host and ask them to increase those limits to a minimum as follows:
max_execution_time 180memory_limit 256Mpost_max_size 32Mupload_max_filesize 32M
You can easily check on your server resources by: Navigate to Elementor > System Info on admin sidebar or using one of the third party plugins, such as the php server info.
** Note: If you have done all but still encounter this issue and your web sever is Nginx. It might be problem of Nginx server configuration has the too low response time. You should increase the timeout to 300 the try to reinstall the sample data.
Install Theme
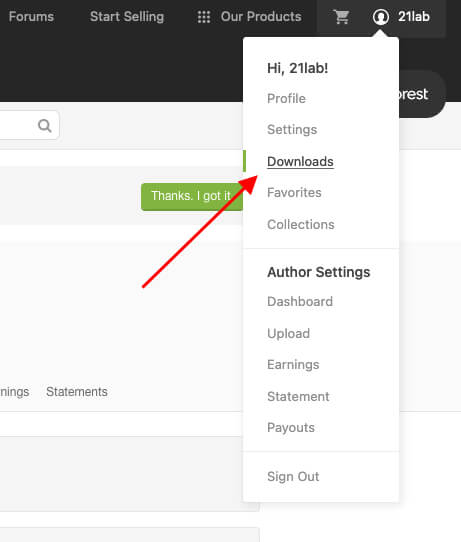
After purchasing, please download the package from ThemeForest. All you need to do is moving your mouse over your login name at the right top corner – after you log in ThemeForest, and then click Downloads.
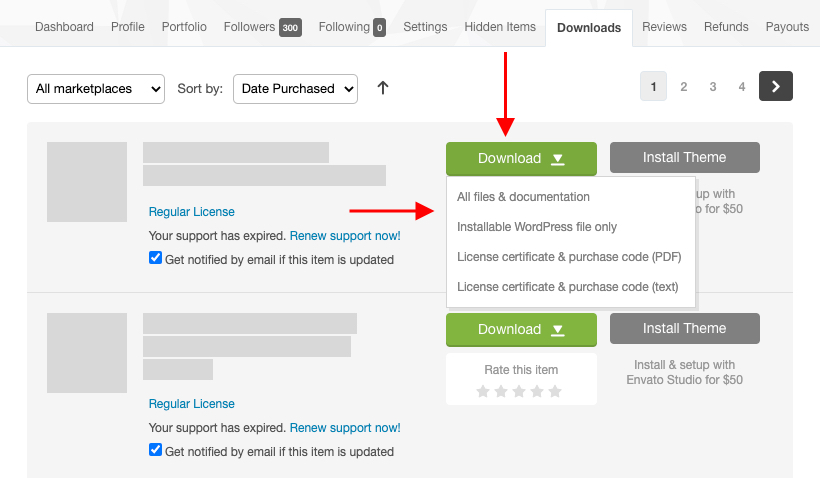
Here you will find all the items that you have purchased. Hover to Download button next to NanoFit, you will see these download options:
- Installable WordPress file only which you can upload when installing theme
- All files & documentation (full zip folder). You will need to extract and locate the installable WordPress file to upload when installing theme
Install theme via WordPress
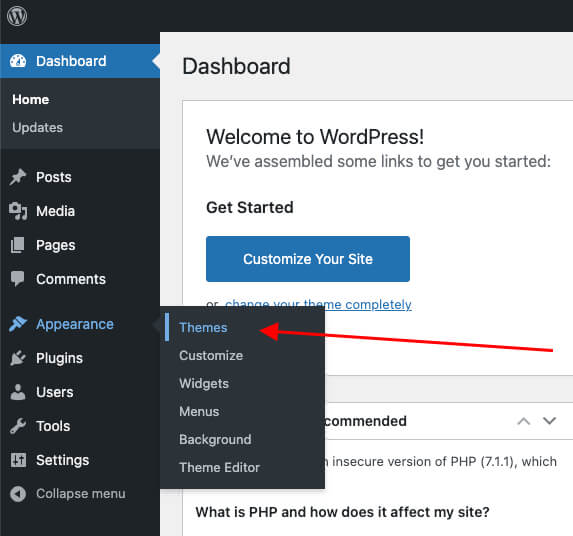
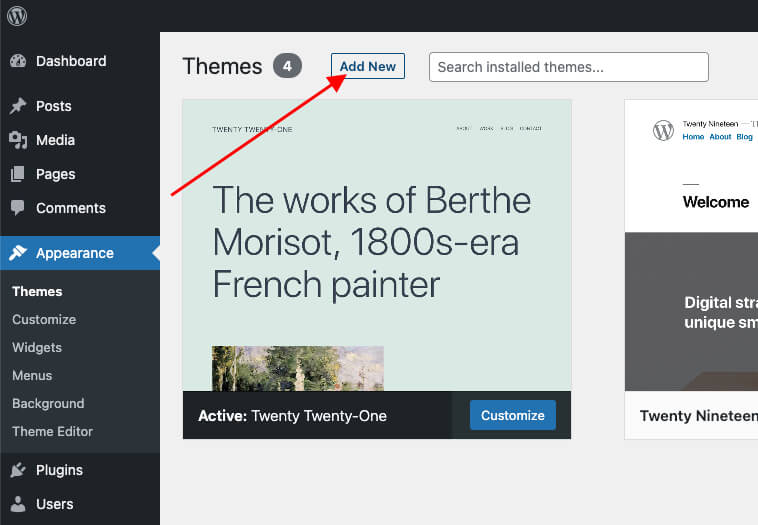
Step 1: Navigate to Appearance > Themes
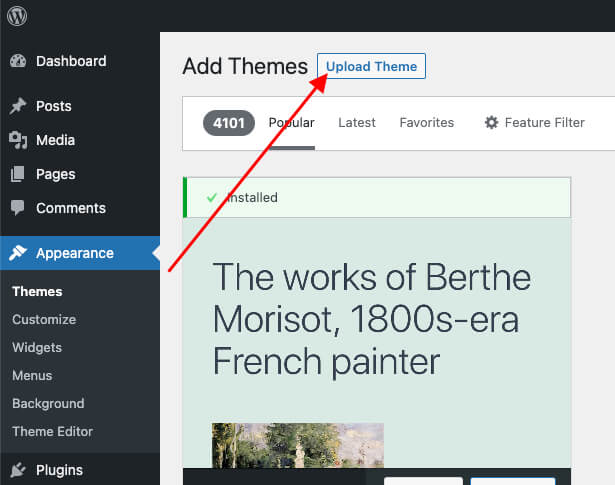
Step 2: Click Add New, then click Upload Theme > Choose File
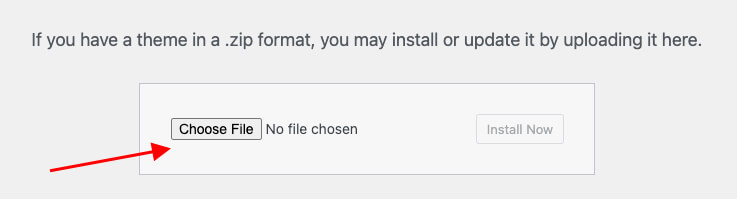
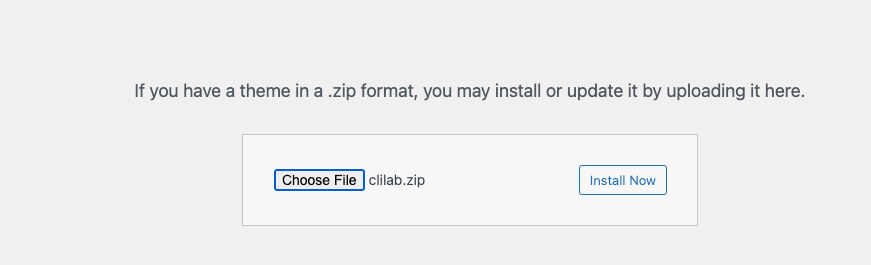
Step 3: Navigate to the .zip file on your computer, then click Install Now
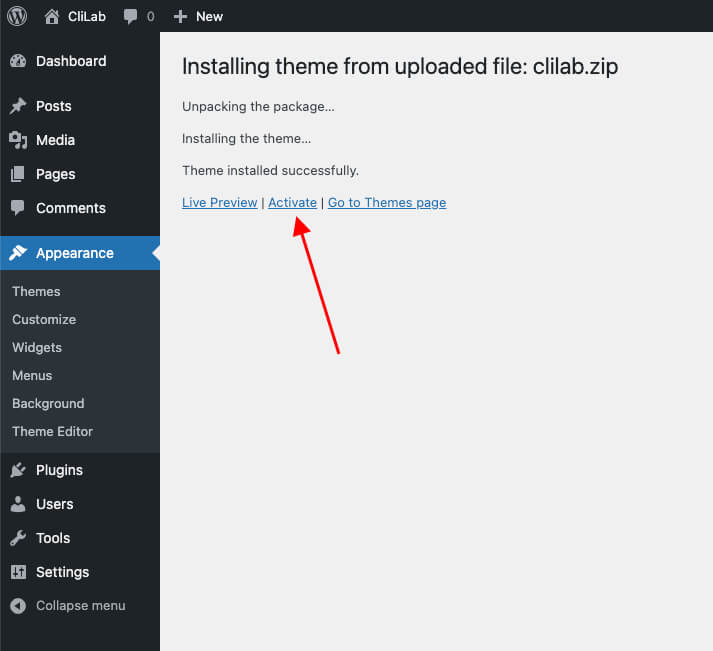
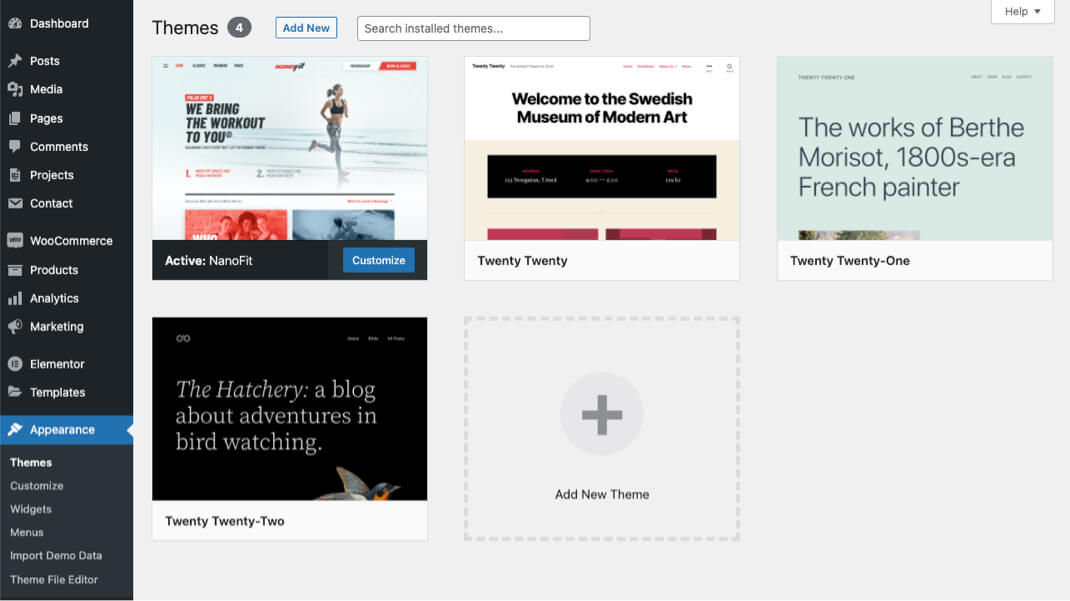
Step 4: When the installation complete, click Activate. You will be redirected to Themes page with NanoFit activated.
Install theme via FTP
Step 1: Unzip zip file package – the zip package is inside NanoFit files folder you have downloaded from ThemeForest.
Step 2: Connect to your FTP server and navigate to the folder where your WordPress is installed.
Step 3: Go to wp-content/themes/ and upload theme folder (the path will look like this: wp-content/themes/NanoFit)
Step 4: Open WordPress admin panel (navigate through the web-browser to the folder where you have installed the WordPress e.g www.yourdomain.com/wp-admin) and go Appearance > Themes on admin sidebar. Activate NanoFit
Install Plugins
After activating NanoFit, you will see this notice:
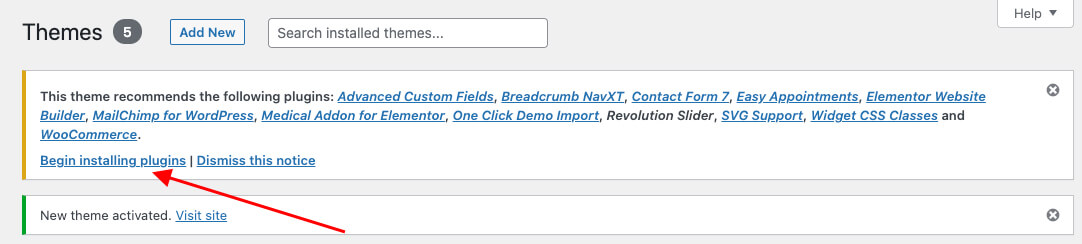
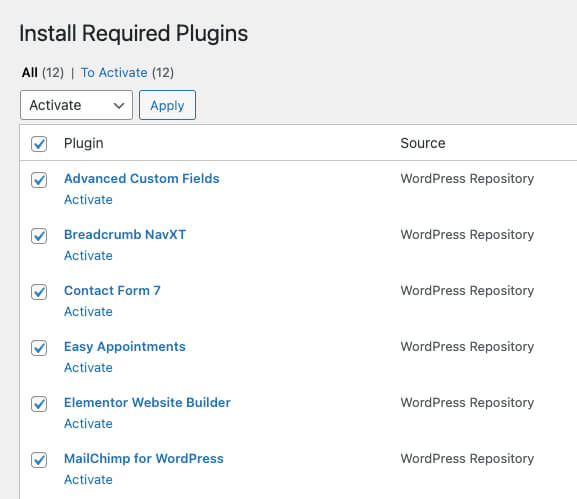
Click Begin installing plugins. You will be navigated to Install Required Plugins page.
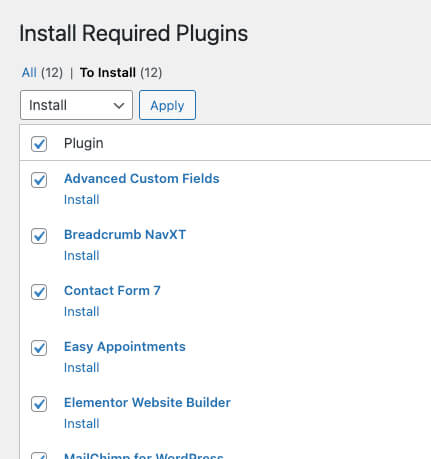
Simply check all of them and from the drop down select Install, then hit Apply.
When finishing, it should look like this:

Next, click Return to Required Plugins Installer or go to Appearance > Installed Plugins check all of theme and from the drop down select Activate and hit Apply
Required plugins: Elementor, Revolution Slider, Medical Addon for Elementor, One Click Demo Import, Advanced Custom Fields, SVG Support.
Recommended plugins: MailChimp for WordPress, WooCommerce, Easy Appointments, Contact Form 7, Breadcrumb NavXT, Widget CSS Classes.
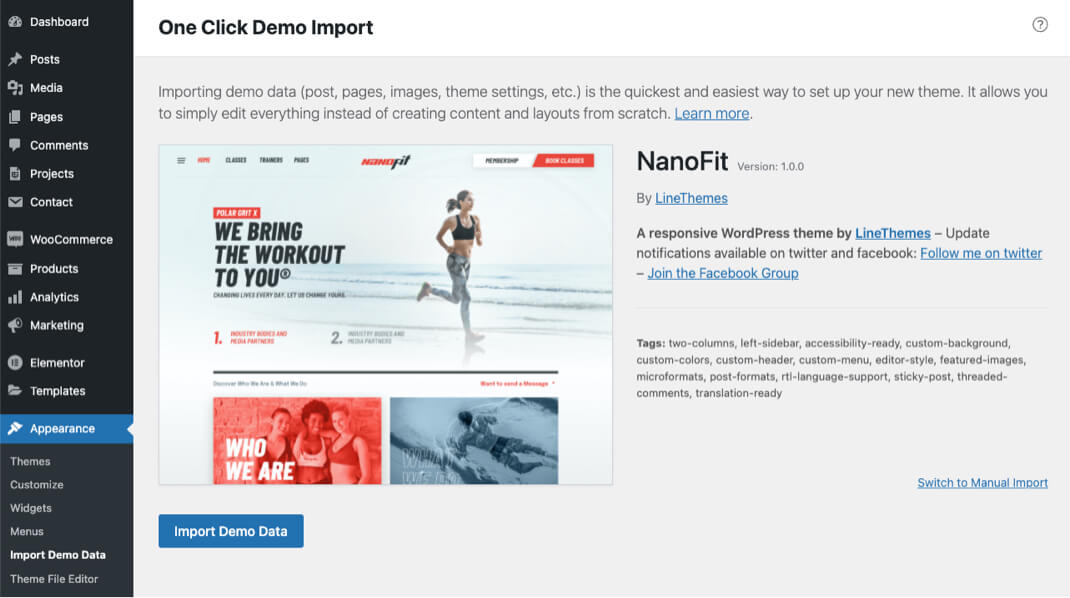
Import Demo Data
Our demo data import lets you have the whole data package in minutes, delivering all kinds of essential things quickly and simply. All you need to do is to navigate to Appearance > Import Demo Data. Hit Import Demo Data.
Next, Confirm the import demo you wish to proceed with. Click Continue & Import
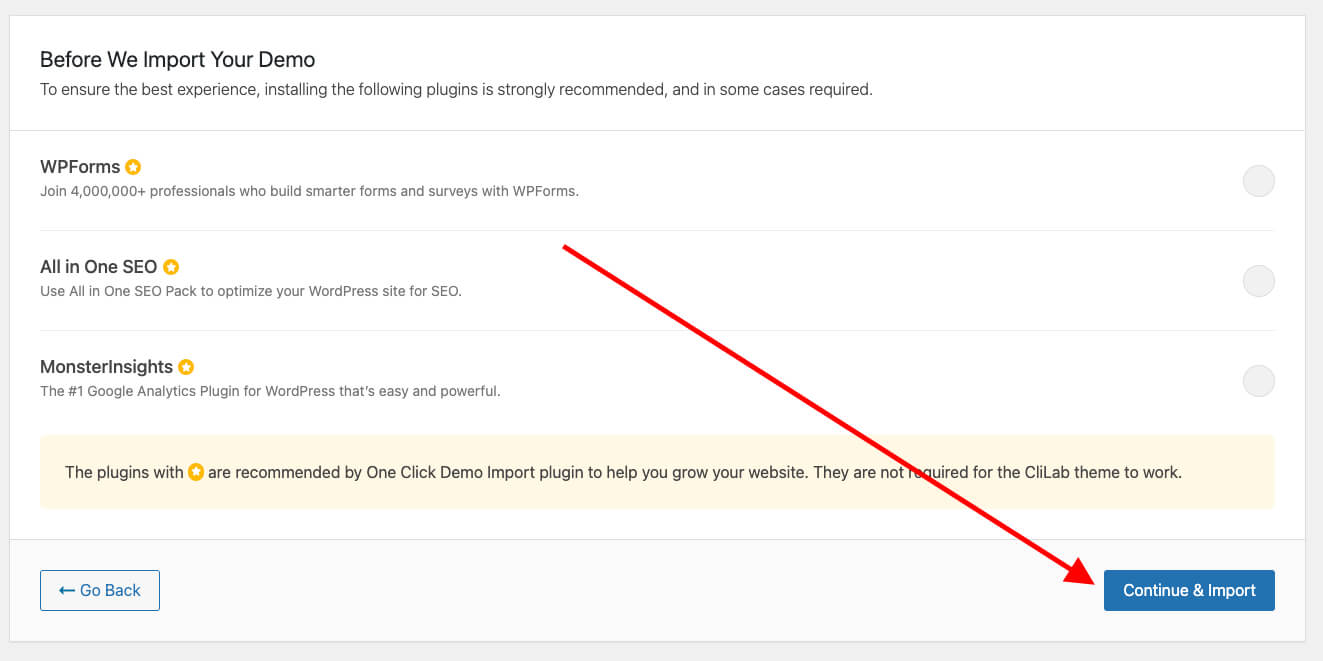
Have a cup of coffee. The process is within minutes. (it may take up to 10 minutes to download resources)
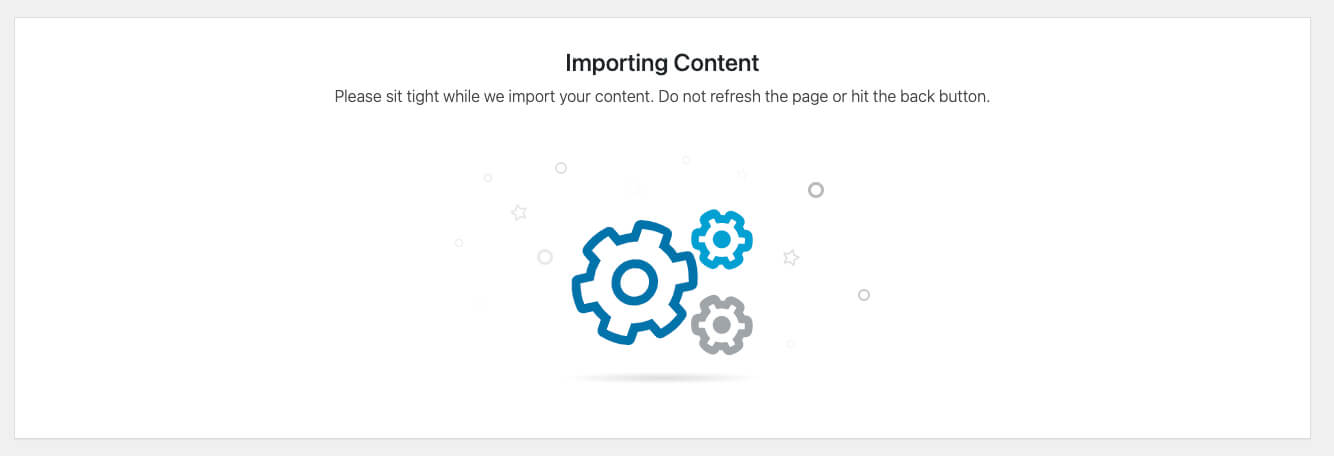
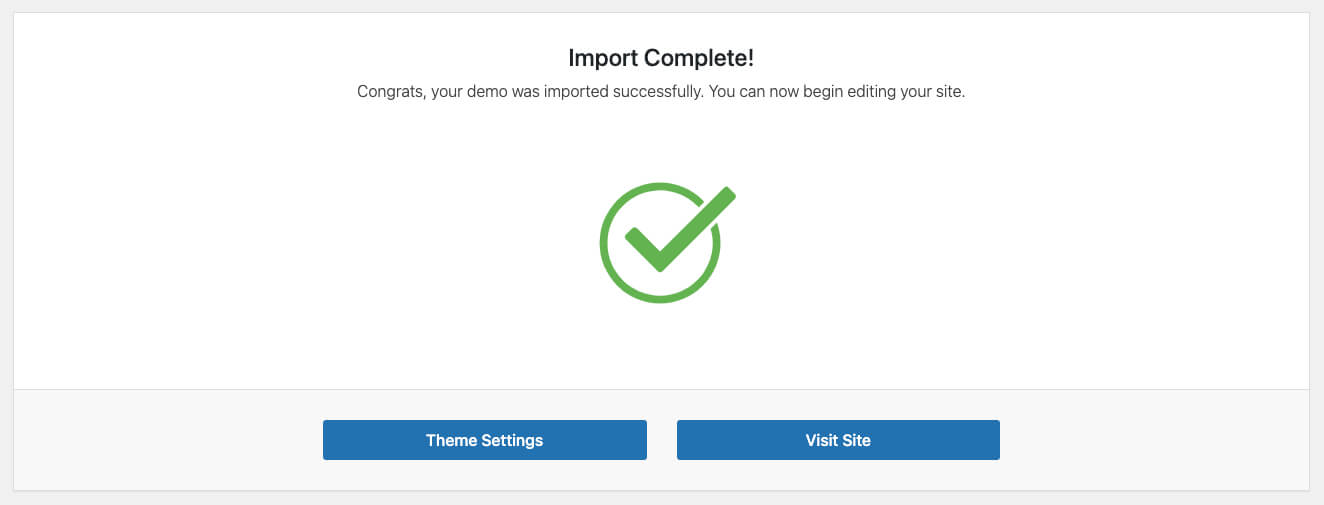
When finishing, it should look like this:
Note: After finished importing, go to Elementor > Setting. Disable Default Colors & Fonts then hit Save changes.

Update Theme
Updating your theme to the latest version is so important since it not only offers you the new features but also protects you from other bugs. We hope that the following guide will help you carry out this task much more easily.
NOTICE: it is recommended that you should back up your theme before updating its new version, particularly if you have made some modifications. Also, install the child theme is recommended.
There are 3 ways to update a theme: Update Manually, Update via Envato Market Plugin and Update via FTP.
Update Manually
Step 1: Download the theme package from ThemeForest and get the file theme.zip (eg:NanoFit.zip).
Step 2: You need to deactivate the current theme in Appearance > Themes by simply activating a different theme. Once you activate a different theme, delete the NanoFit.
Step 3: Retrieve the NanoFit.zip file from your new Themeforest download. If you download All files & documentation, then you need to unzip the archive file you received, the NanoFit.zip file will be inside of it.
Step 4: Then simply upload and activate the NanoFit file in the Appearance > Themes section like you've done when installing theme.
Update via Envato Market plugin
Please download and install plugin Envato Market from https://envato.com/market-plugin/. You should follow an instruction to update the theme from this page.
Update via FTP
Step 1: Backup your old theme (1)
Step 2: Login to FTP, Upload the new theme override the old one in wp-content/themes folder
Step 3: Re-apply your customization (2)
Backup theme: You can use FTP client to make a copy of your old theme located on wp-content/themes folder
Re-apply customization: if you have to do any code change, please merge it from the old version to the new one. BUT if you used Child Theme to customize your site before, this step will be skipped.
Last But Not Least: After updating your theme, it's important to update your required plugins to ensure both theme & plugins can work properly. Go to Plugins > Installed Plugins then update all the plugin which have Required Update status.
Theme Customize
Our themes comes with advanced settings panel that is loaded with options. We have the options organized into logical tabbed sections, and each option has a description of what it will do on the front end. Because of the sizable amount of options our theme provides, we cannot go over them in full detail here in our documentation. We encourage you to please take some time and navigate through each tab to see what we offer.
Go to Appearance > Customize on admin sidebar to access the setting options. See below for screenshot of our Customize panel.

Topbar
Navigate to Appearance > Customize > Header & Footer > Topbar Setting

Make all the necessary changes then hit Publish button to save your settings.
Logo
Navigate to Appearance > Customize > Logos > Logo Default
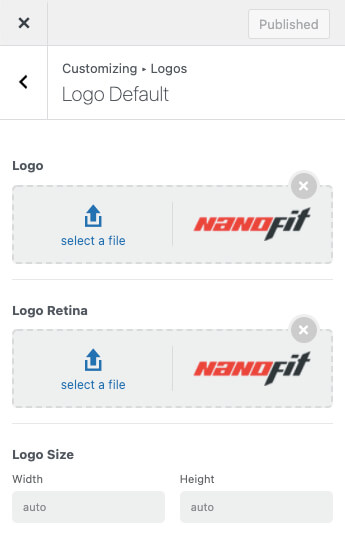
Logo: The logo file for the normal screen.
Logo Retina: The logo file with high DPI for the retina screen.
Logo Size: The size of the logo will be show on the screen.
Change Header Styles
Navigate to Appearance > Customize > Header & Footer > Header Setting - General
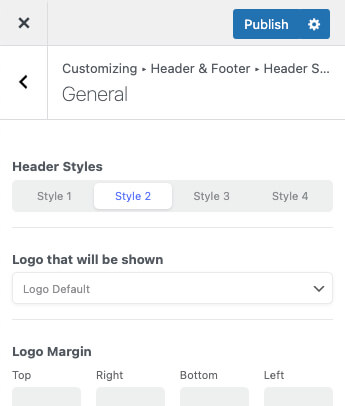
Now the chosen header style is set to be the default header of all pages. However, you can still set a different header style for particular pages, blogs or products by setting a style in each section.
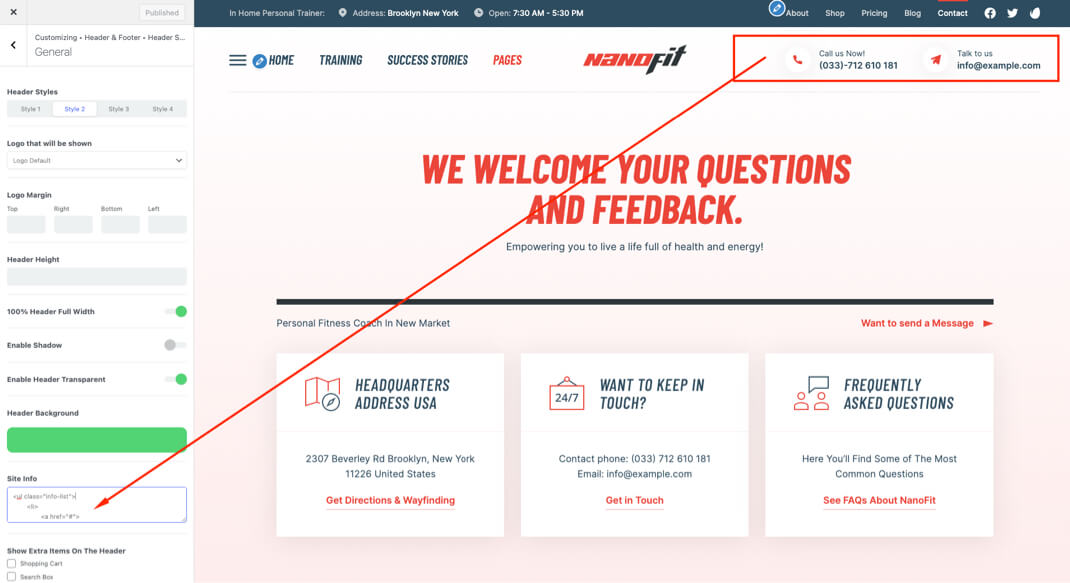
Change Header Info
Navigate to Appearance > Customize > Header & Footer > Header Setting - General and Scroll Down
Header Sticky
A sticky header has its position fixed at the top of your webpage even when users scroll down to navigate the page. This allows users to quickly access the menu from any section of the page.
Navigate to Appearance > Customize > Header & Footer > Header Sticky Setting - General Settings
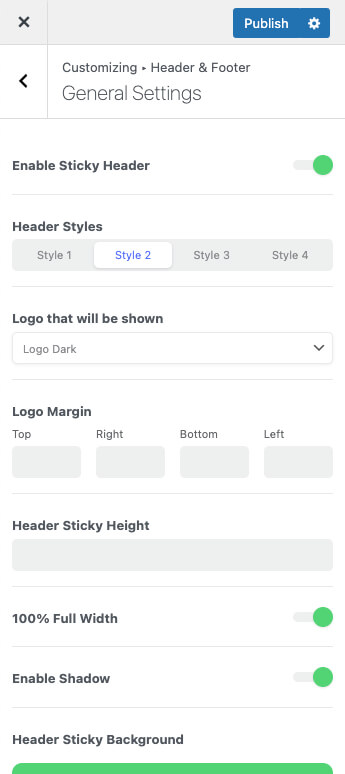
Now you can enable or disable the Sticky Header. In addition, you can also customize its Background, Header Styles,... of the Sticky Header.
Title Bar/Page Title
You can enable or disable the Title Bar. In addition, you can also customize its Background, Styles, Breadcrumbs, On/Off Scroll Down button, ... of the Title Bar.
Navigate to Appearance > Customize > Header & Footer > Title Bar
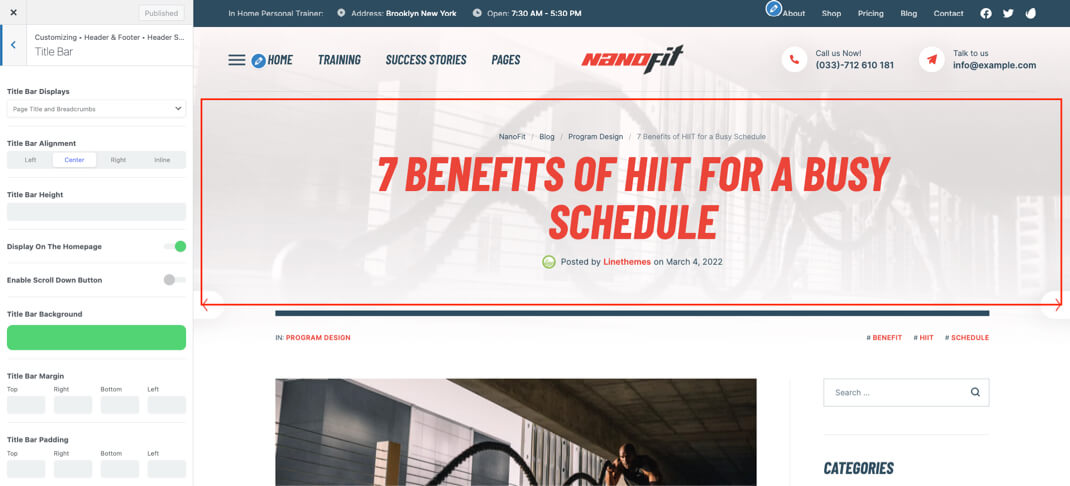
Now the chosen Title Bar Alignment is set to be the default of all pages. However, you can still set a different style for particular pages, blogs or products by setting a style in each section.
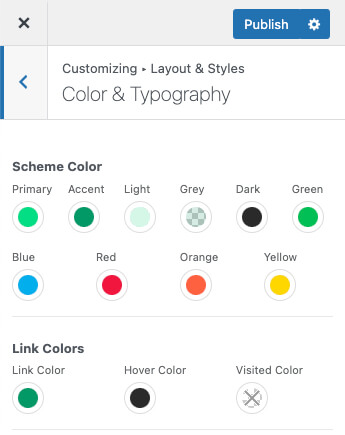
Change Scheme Color
With this option, you can change unlimitedly the accent color in your site
Navigate to Appearance > Customize > Layout & Styles > Color & Typography
Change Fonts
Navigate to Appearance > Customize > Layout & Styles > Color & Typography
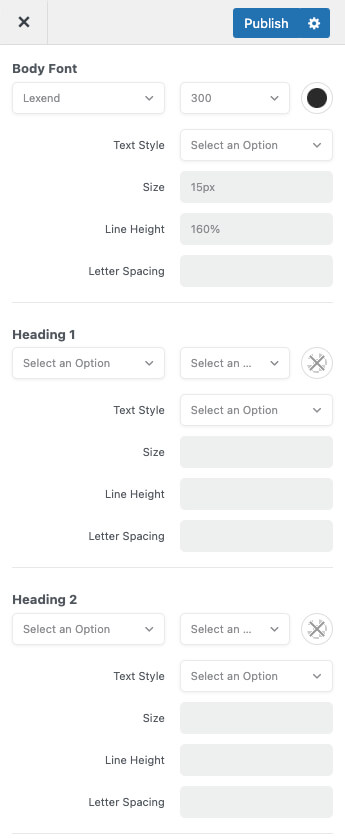
Now you can select the font family, color, size or weight for the Body text, Heading text, Blockquote text.
Footer
Navigate to Appearance > Customize > Header & Footer
Footer was divided into 3 different sections: Content Bottom, Footer Widgets and Copyright Setting. The screenshot below will give you an explanation of these sections:
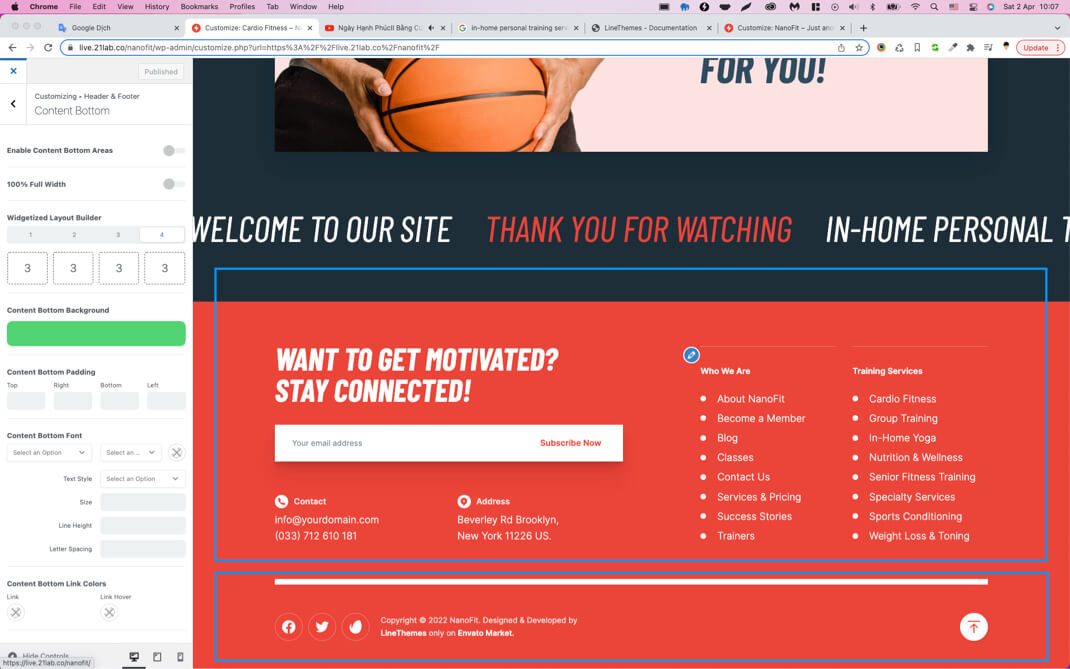
Content Bottom
Choose Content Bottom
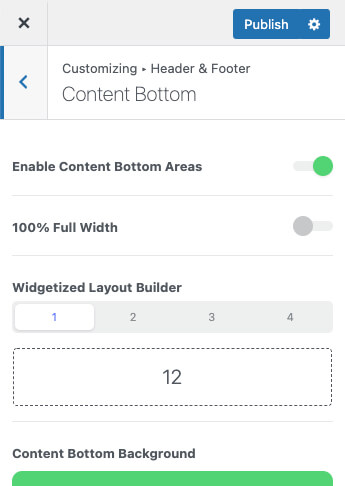
Enable Content Bottom Areas: Turn on/off to show/hide the Content Bottom Area
Widgetized Layout Builder: You can select how many areas will be displayed on footer widgets section. To customize areas layout, just drag it to match your wish
In addition, you can also customize its Background, Layout, Typography,... of the Content Bottom.
Footer Widgets
Choose Footer Widgets
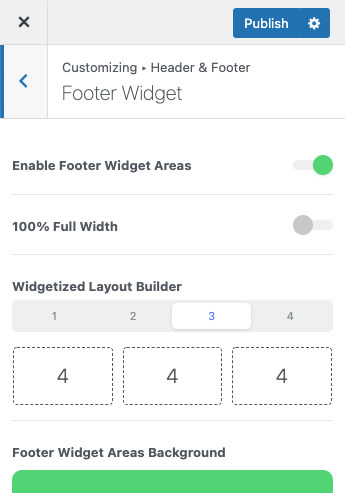
Enable Footer Widgets Areas: Turn on/off to show/hide the Footer Widgets Area
Widgetized Layout Builder: You can select how many areas will be displayed on footer widgets section. To customize areas layout, just drag it to match your wish
In addition, you can also customize its Background, Layout, Typography,... of the Footer Widgets.
Copyright Setting
Choose Copyright Setting
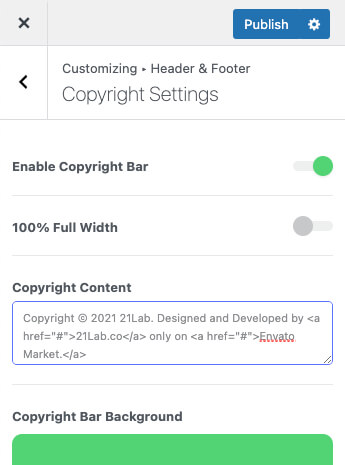
Enable Copyright Bar: Turn on/off to show/hide the Copyright Bar
Copyright Content: Just type the text that you want to display on footer copyright area
In addition, you can also customize its Background, Typography,... of the Copyright Bar.
Change Header Styles
After creating a page, you can scroll down and find Page Options. You can set the page option which priority to display of only this page in front-end.
Switch to tab Header

If the default header is Header Style 1 but you choose Header Style 2 in Page Option > Header then Header Style 2 displays in your page instead of Header Style 1.
Change Tilte Bar/Page Title
After creating a page, you can scroll down and find Page Options. You can set the page option which priority to display of only this page in front-end.
Switch to tab Title Bar

Title: Enter the custom title you want to show on the title bar.
Subtitle: Just type the text that you want to display on the title bar.
Layout: Select the content layout for titlebar that you want to display: Default, Page Title and Breadcrumbs, Page Title Only, Breadcrumbs Only and None (Disable).
Content Alignment: Select an alignment for the titlebar content.
How to Create Cover Image?
The screenshot below will give you an explanation of these sections
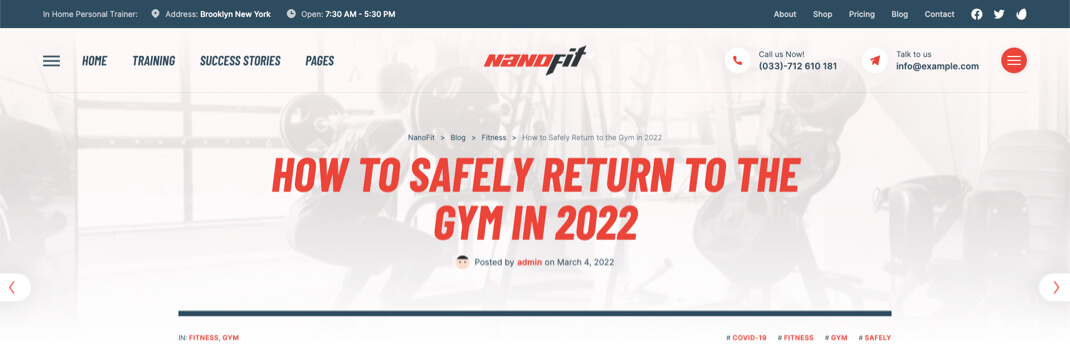
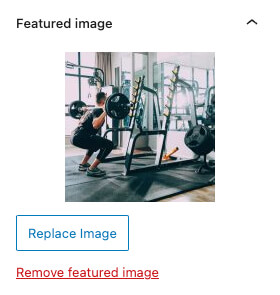
After creating a page, you can Set Featured Image to Cover Image
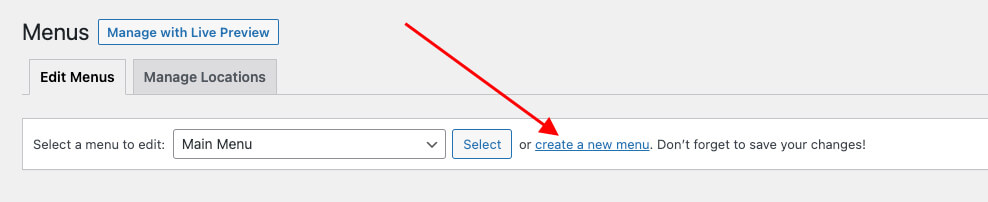
Create Mobile Menu
Step 1: Navigate to Appearance > Menus in your admin sidebar and click Create a new menu option.
Step 2: Give your menu a name, then hit Create Menu.
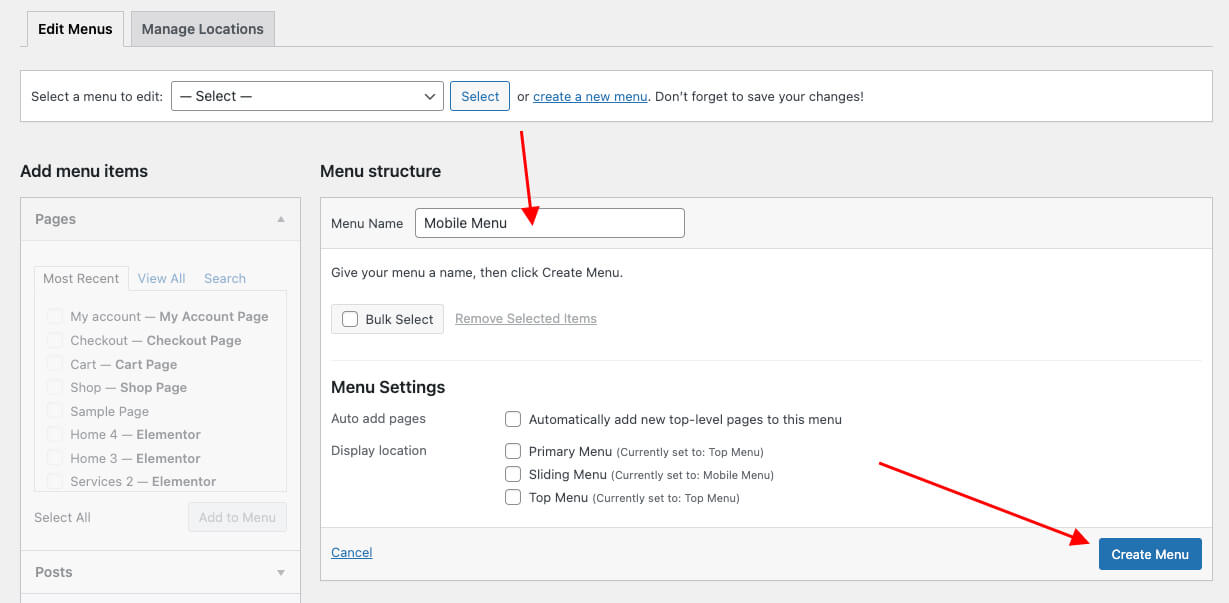
Step 3: Choose menu items you want to add from the left and hit Add to Menu.
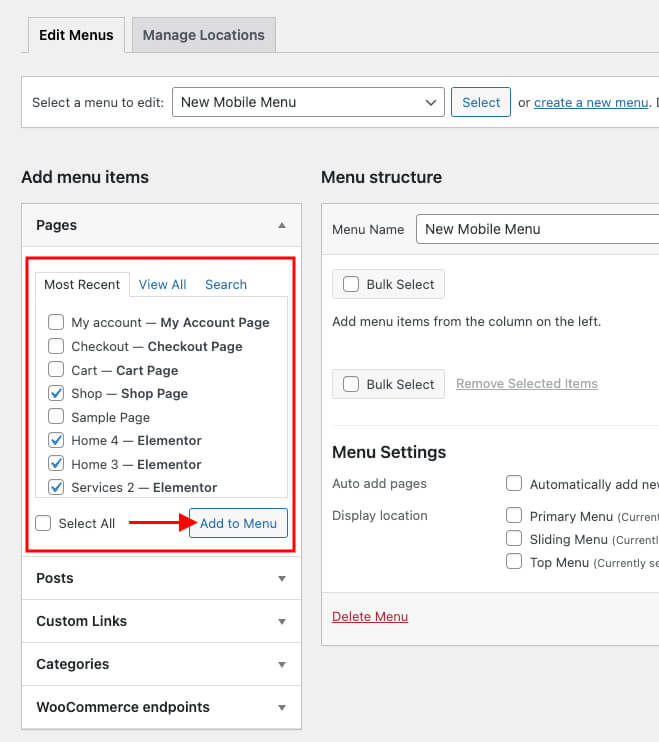
Step 4: Choose display location is Sliding Menu and hit Save Menu.
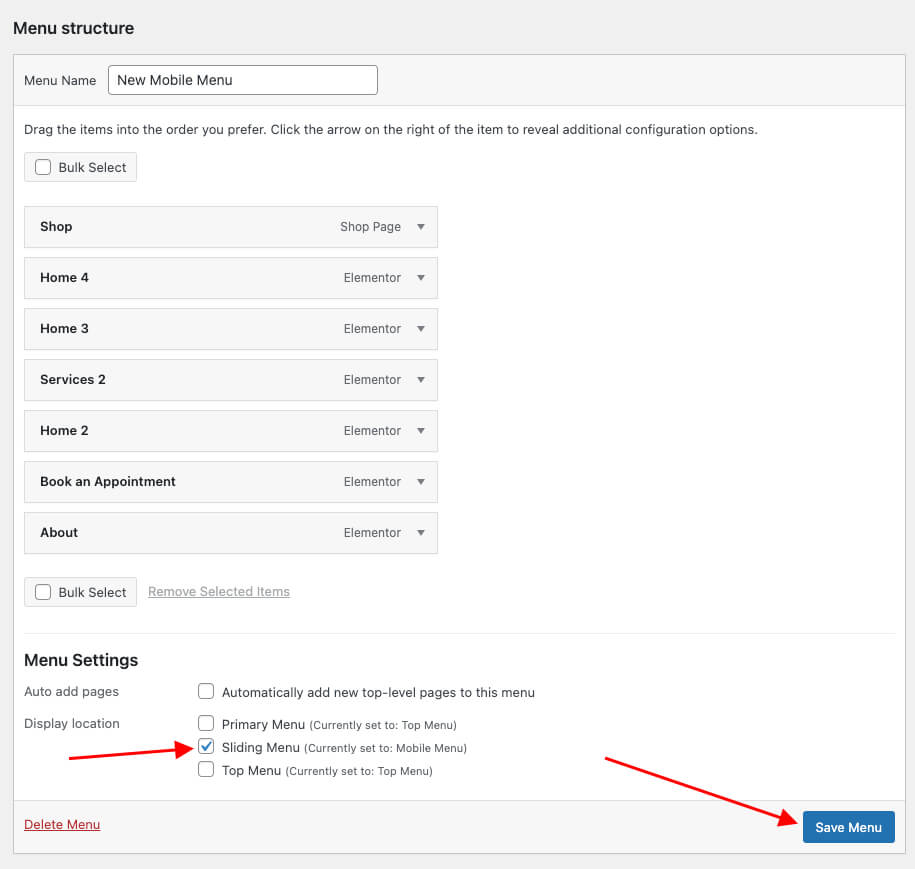
Now, Your new menu has been created.
Customize Mobile Menu
Navigate to Appearance > Customize > Layout & Styles > Sliding Menu
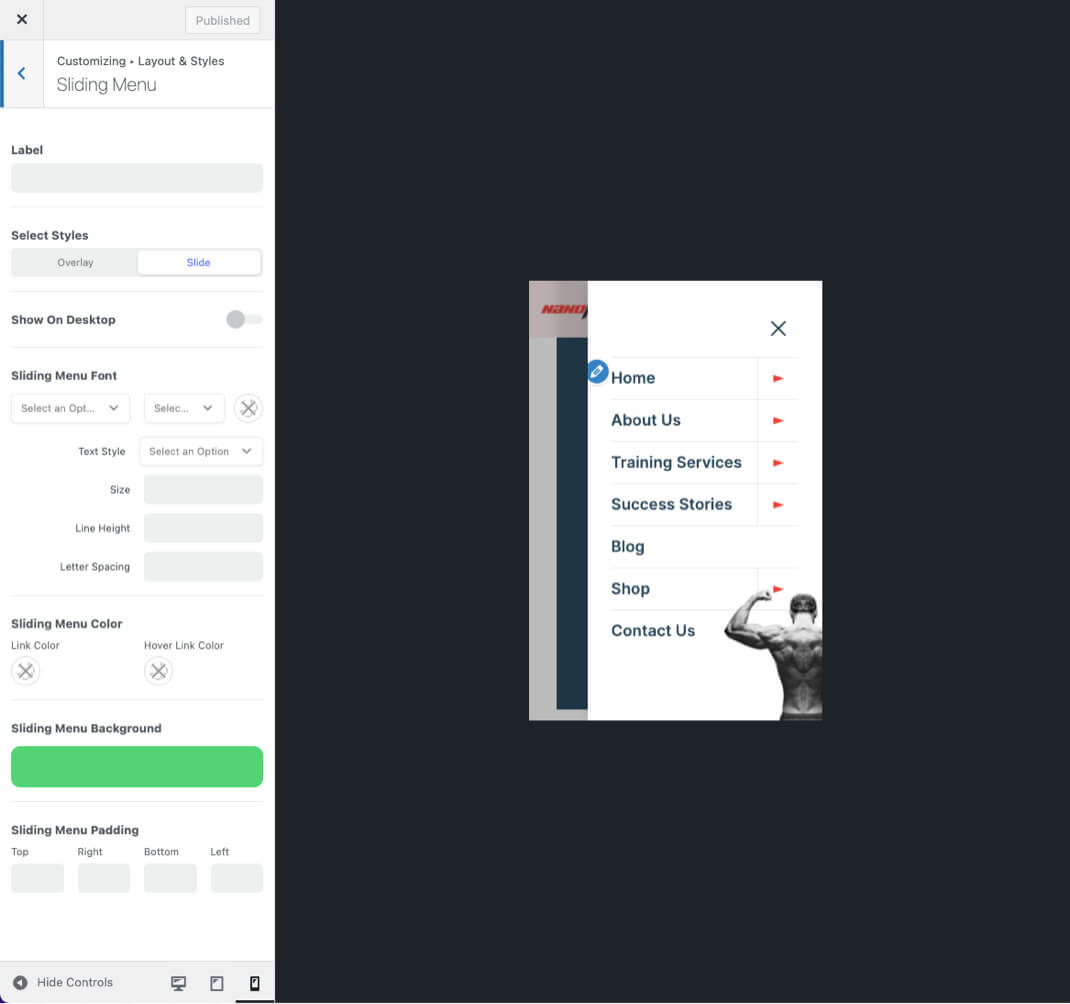
Label: Just type the text that you want to display next to icon (Eg: Menu)
Select Styles: There are 2 different sliding types for you to select: Overlay and Slide.
Show on Desktop: Suitable for minimalist websites, used as an alternative to the main menu.
In addition, you can also customize its Background, Typography,...
Enable Off-Canvas Menu
The screenshot below will give you an explanation of these sections
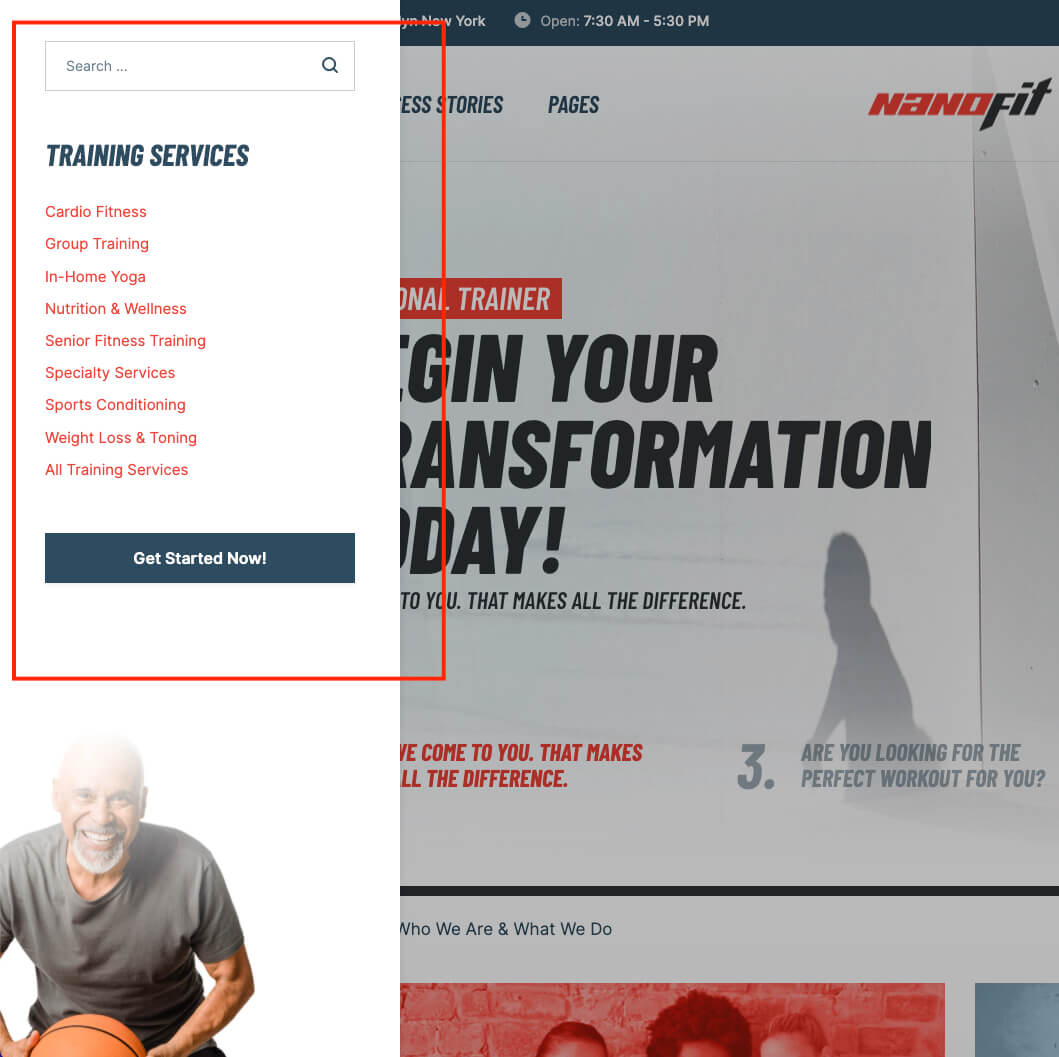
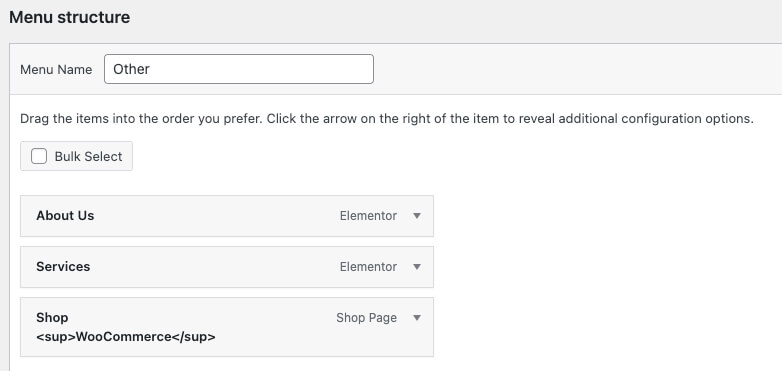
Step 1: Create a menu sorted like this:
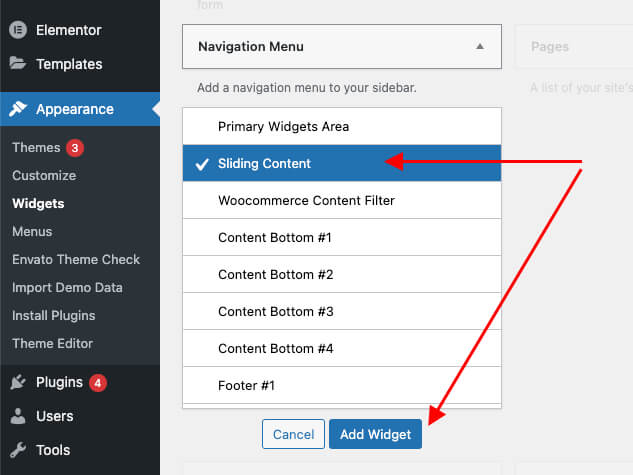
Step 2: Navigate to Appearance > Widgets then Add a Navigation Menu to sidebar Sliding Content
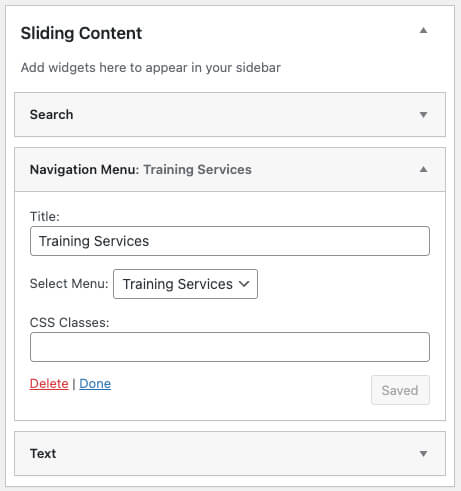
Step 3: At the Sliding Content Sidebar Area, select your menu, then hit Save.
Introduction
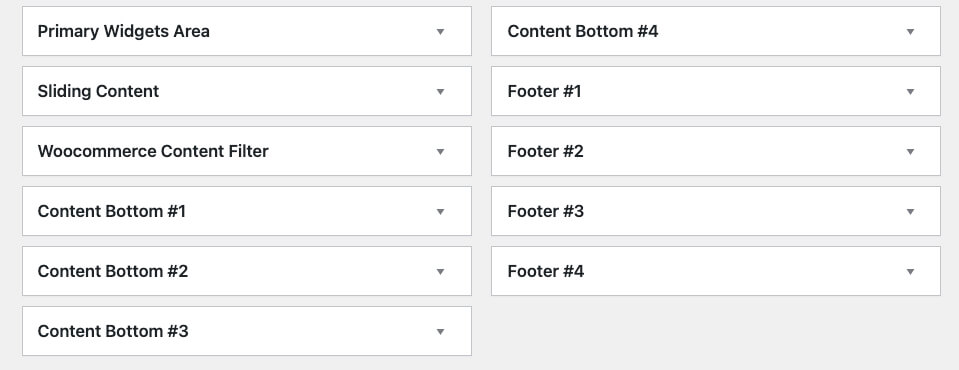
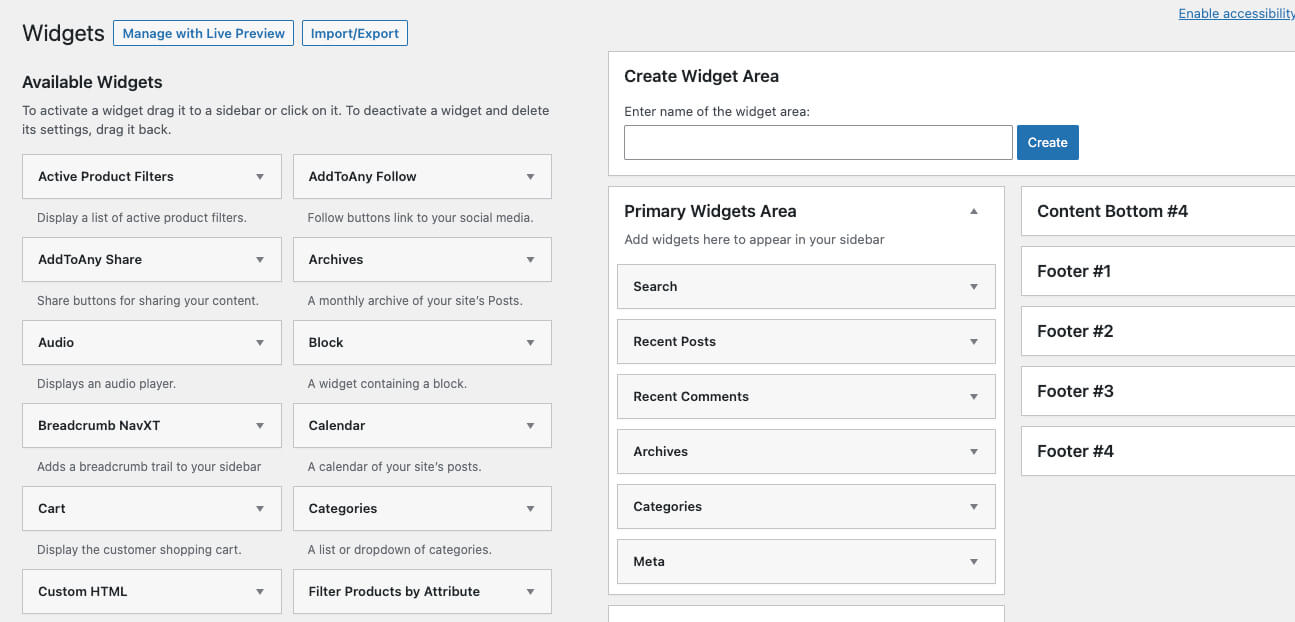
This theme support 11 widgets areas listed below:
- Primary Widget Areas: This is the default sidebar, it will be displayed on the left or right of your page depend on the sidebar position you choose.
- Sliding Content: This areas will be used to display Sliding Content
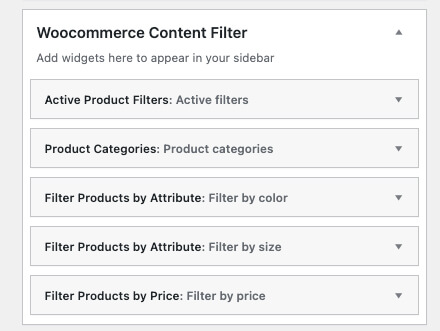
- WooCommerce Content Filter: This areas will be used to display in Shop page
- Content Bottom #1 to #4: This areas will be used to display content bottom widgets
- Footer #1 to #4: This areas will be used to display footer widgets
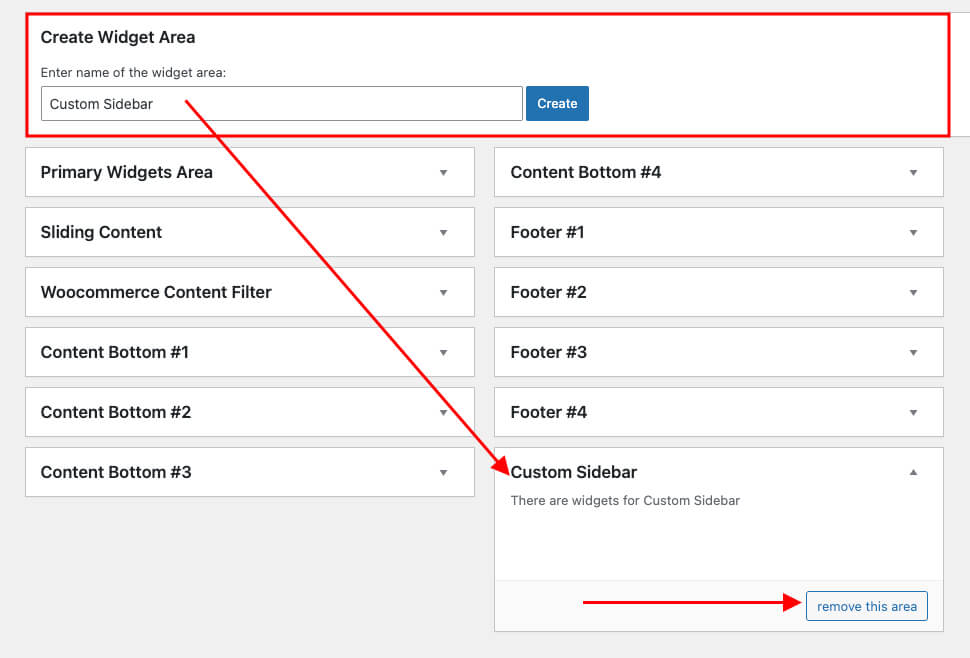
Beside the built-in sidebar areas, we provide a feature called Custom Sidebar. With this feature, you can create unlimited sidebar areas. To create a custom sidebar, just navigate to Appearance > Widgets you will see the box Create Widget Area on the right. Please enter the sidebar title as you want and click to Create button, a custom sidebar will be created.
To remove a custom sidebar, in Appearance > Widgets please open the sidebar that you want to remove. Click button remove this are
Add Widget in Sidebar
Step 1: Navigate to Appearance > Widgets. You can see all of the Sidebar here.
Step 2: Choose the Widgets you want and drag it to the Sidebar you want or click on it to choose the Sidebar.
In the case you want to delete its settings, drag it back.
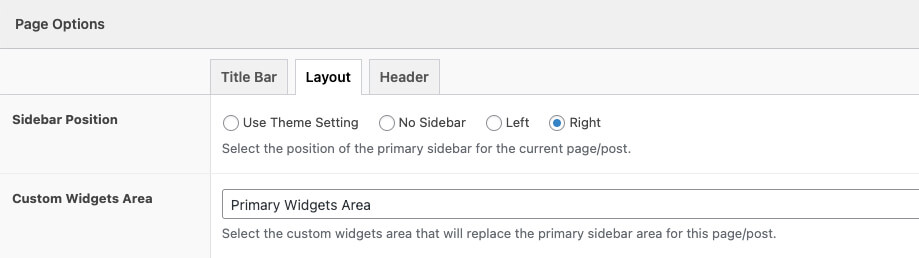
Add Sidebar for a Page
Step 1: After creating a page, come to Page Options.
Step 2: Switch to tab Layout and select position is Left or Right. Next, Select the custom widgets area, then hit Publish
Blog Layout
Customize the style for the blog posts that will appearing on the archive page.
Navigate to Appearance > Customize > Blog & Post > Blog Setting
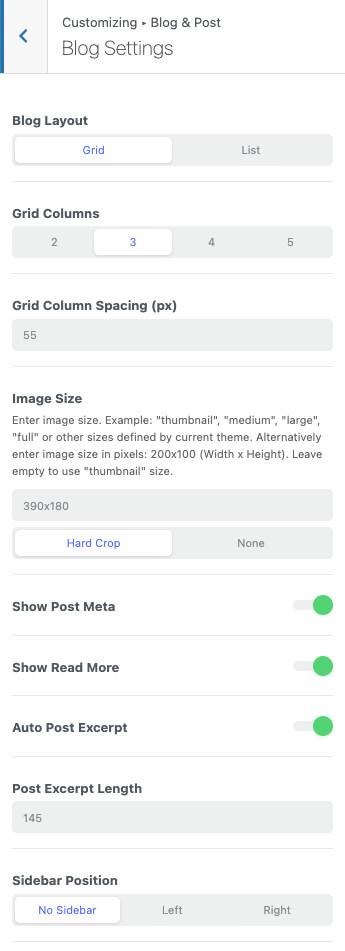
Blog Layout: There are 2 different layout types for you to select: Grid and List.
Grid Columns: Select 2,3,4 or 5 columns to display (if you select Blog Layout Grid).
Grid Column Spacing: Sets the Gaps (gutters) between Columns (if you select Blog Layout Grid).
Image Size: Enter image size. Example: "thumbnail", "medium", "large", "full" or other sizes defined by current theme. Alternatively enter image size in pixels: 200x100 (Width x Height). Leave empty to use "thumbnail" size.
Show Post Meta: Turn on/off to show/hide the Post Meta.
Show Read More: Turn on/off to show/hide the Read More button.
Auto Post Excerpt: Turn on/off to Enable/Disable Auto Post Excerpt.
Post Excerpt Length: How many character you want in short content paragraph.
Sidebar: You can select Sidebar and Sidebar Position to display on the archive page.
Single Setting
Customize the style of the post.
Navigate to Appearance > Customize > Blog & Post > Post Setting
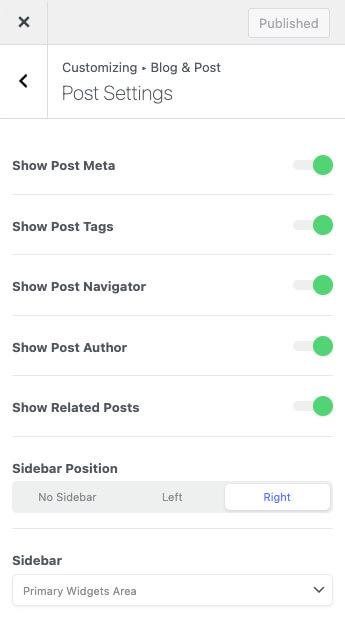
Show Post Meta: Turn on/off to show/hide the Post Meta.
Show Post Tags: Turn on/off to show/hide the Post Tags.
Show Post Navigator: Turn on/off to show/hide Post Navigator.
Show Post Author: Turn on/off to show/hide Post Author.
Show Related Posts: Turn on/off to show/hide Related Posts.
Sidebar: You can select Sidebar and Sidebar Position to display on the Single Post.
Related Posts
Controls the related posts.
Navigate to Appearance > Customize > Blog & Post > Related Posts
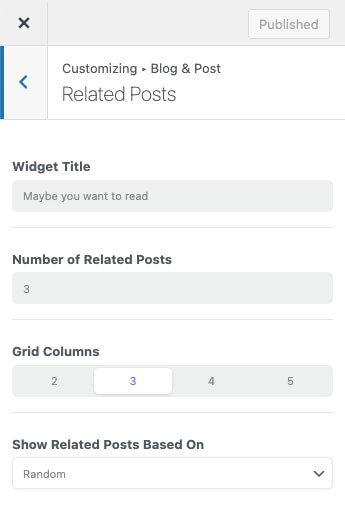
Widget Title: Just type the text that you want to display on the title.
Number of Related Posts: Enter number of posts you want to display.
Grid Columns: Select 2,3,4 or 5 columns to display.
Show Related Posts Based On: You can select: by Tag, Category, Recent or Random
How to Create Project?
Step 1: Navigate to Projects > Add New
Step 2: Add the Content, Gallery, Category, Featured Image and Client Info... of Project you need in the box.
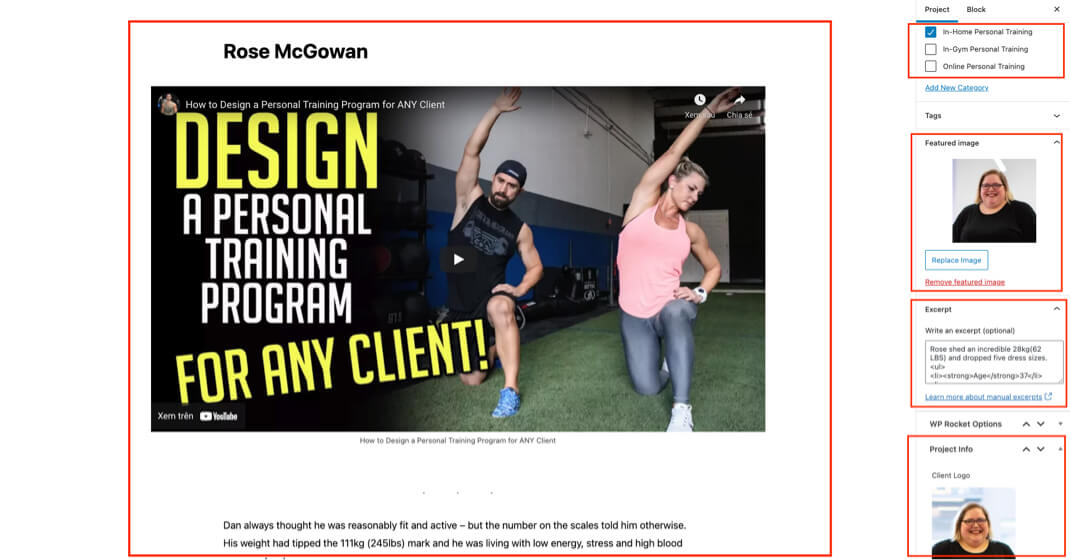
Step 3: Scroll down to Page Options. You can customize all the sections here.
Step 4: Click Publish to save it.
How to use Shortcodes?
Project comes with several shortcodes that can be used to insert content inside posts and pages.
[projects mode="style1" columns="3" filter="yes" filter_by="category" limit="9" offset="0" thumbnail_size="full" readmore_text="Read More"]
Display Projects Attributes
mode- The style of projects to display, you can choose:style1,style2,style3columns- The number of columns to display, you can choose:2,3,4,5filter- Turn on/off projects filter, you can choose:yesornofilter_by- You can choose:categoryortaglimit- The number of projects to display.offset- Means start showing project not from the first project.thumbnail_size- Enter image sizethumbnail,medium,large,fullor custom sizereadmore_text- The text button to display. If you want disable button, please replace:readmore="no"
Shop Page
Navigate to Appearance > Customize > Shop > Product Archive
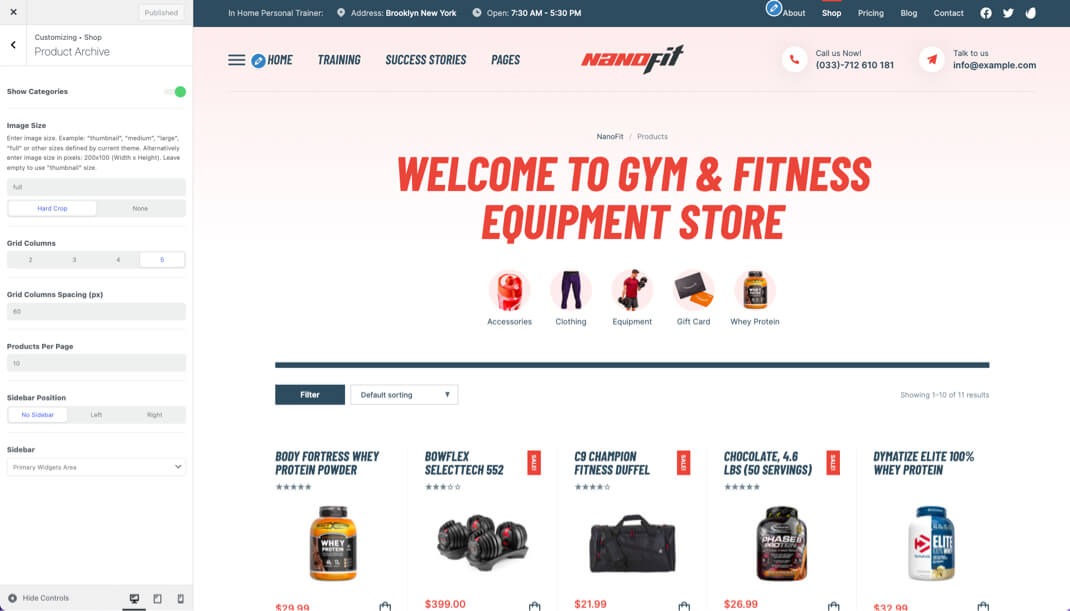
Image Size: Enter image size. Example: "thumbnail", "medium", "large", "full" or other sizes defined by current theme. Alternatively enter image size in pixels: 200x100 (Width x Height). Leave empty to use "thumbnail" size.
Grid Columns: Select 2,3,4 or 5 columns to display.
Grid Column Spacing: Sets the Gaps (gutters) between Columns.
Products Per Page: Enter number of products you want to display.
Sidebar: You can select Sidebar and Sidebar Position to display on the Product Archive.
For more settings of WooCommerce, View WooCommerce Docs.
Shop Page
Navigate to Appearance > Customize > Shop > Product Single
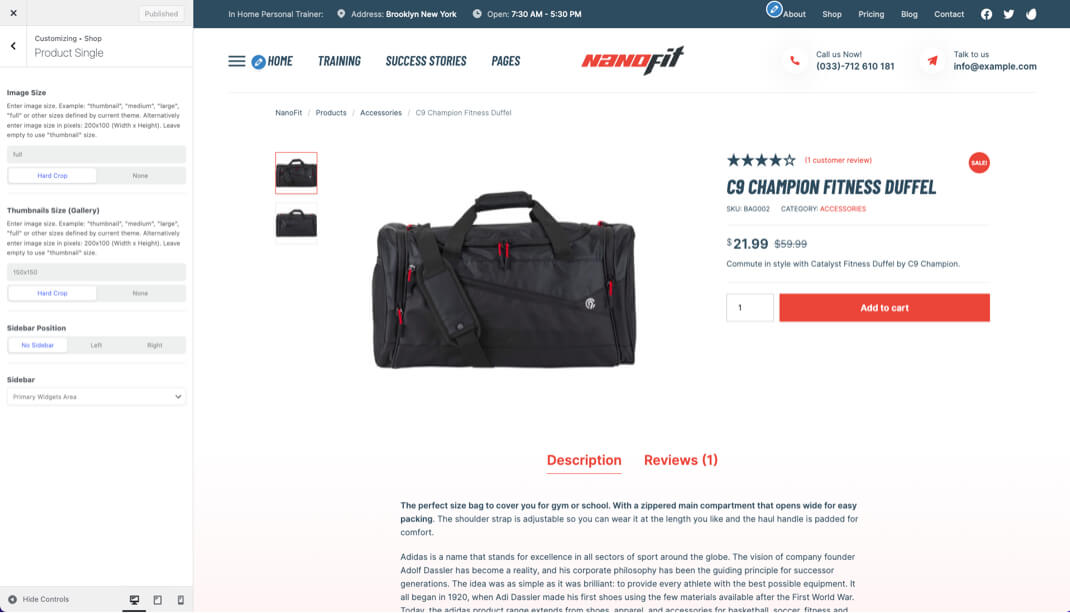
Image Size: Enter image size. Example: "thumbnail", "medium", "large", "full" or other sizes defined by current theme. Alternatively enter image size in pixels: 200x100 (Width x Height). Leave empty to use "thumbnail" size.
Thumbnails Size (Gallery): Enter image size. Example: "thumbnail", "medium", "large", "full" or other sizes defined by current theme. Alternatively enter image size in pixels: 200x100 (Width x Height). Leave empty to use "thumbnail" size.
Sidebar: You can select Sidebar and Sidebar Position to display on the Product Archive.
For more settings of WooCommerce, View WooCommerce Docs.
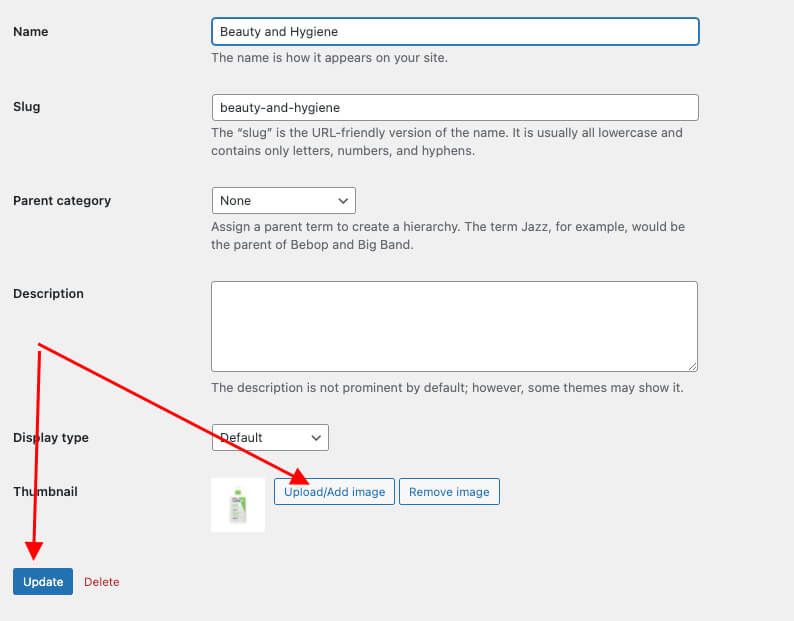
Change Category Images
The screenshot below will give you an explanation of these sections
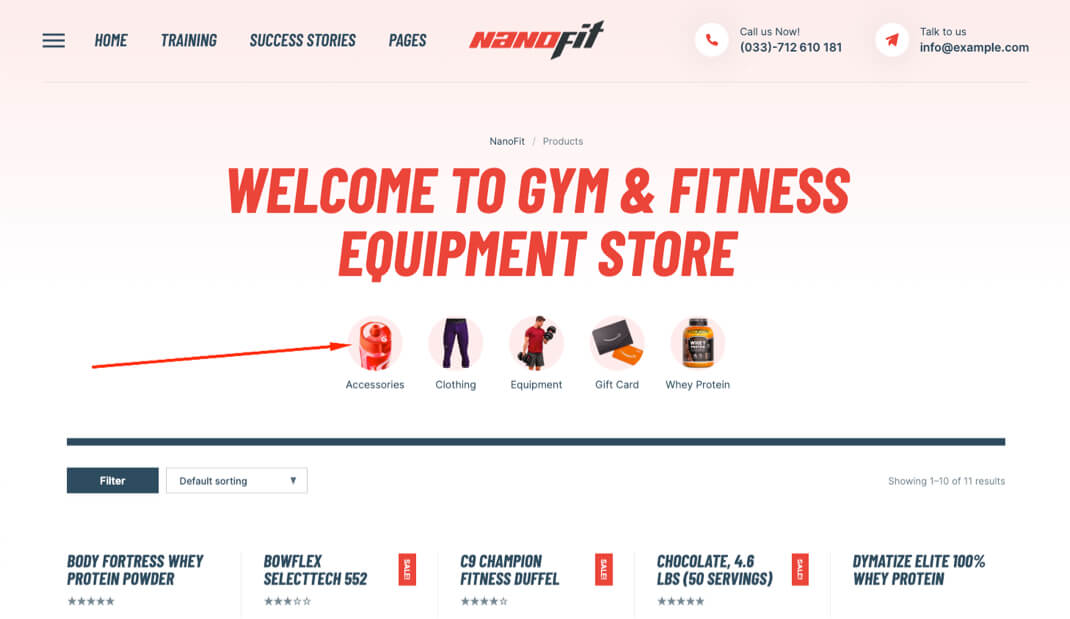
Step 1: Navigate to Products > Categories in your admin sidebar and choose items you want to edit from the right and hit Edit

Step 2: Upload/Add Image then hit Update
Enable Off-Canvas Filter
The screenshot below will give you an explanation of these sections
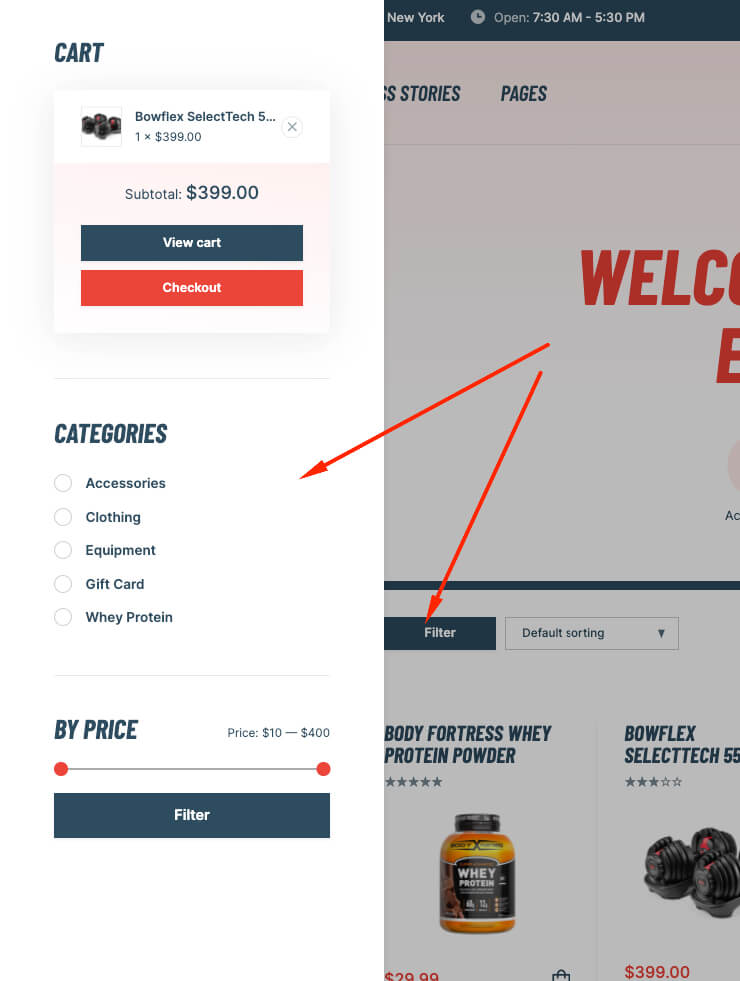
Step 1: Navigate to Appearance > Widgets.
Step 2: Choose the Widgets and drag it to the Sidebar WooCommerce Content Filter or click on it to choose the Sidebar WooCommerce Content Filter.
How to Replace URL after Import Demo Data?
After installing sample data, some links are going to our demo. There are 2 ways to Replace URL: Replace via Elementor or Better Search Replace plugin.
Replace via Elementor
NOTICE: Please backup your database before using this plugin!
Step 1: Navigate to Elementor > Tools switch to tab Replace URL
Step 2: Enter text field like the image. Then hit Replace URL
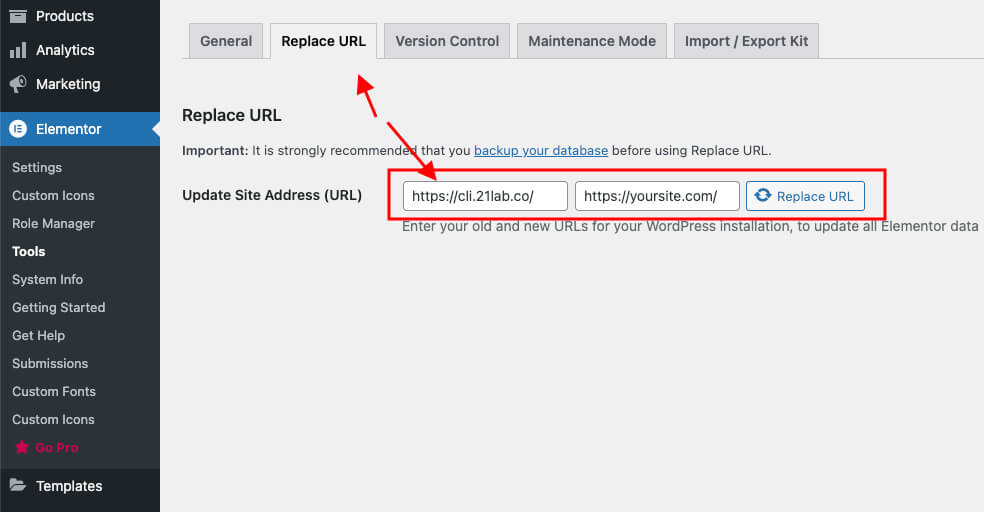
** Note: This way only replaces the content generated by Elementor (excluding Slider and Widgets)
Replace via Better Search Replace plugin
This is our preferred way. Please download and install plugin Better Search Replace from https://wordpress.org/plugins/better-search-replace/
NOTICE: Please backup your database before using this plugin!
Step 1: Navigate to Tools > Better Search Replace
Step 2: Enter text field like the image. Next, select all tables, then unchecked at Run as dry run?
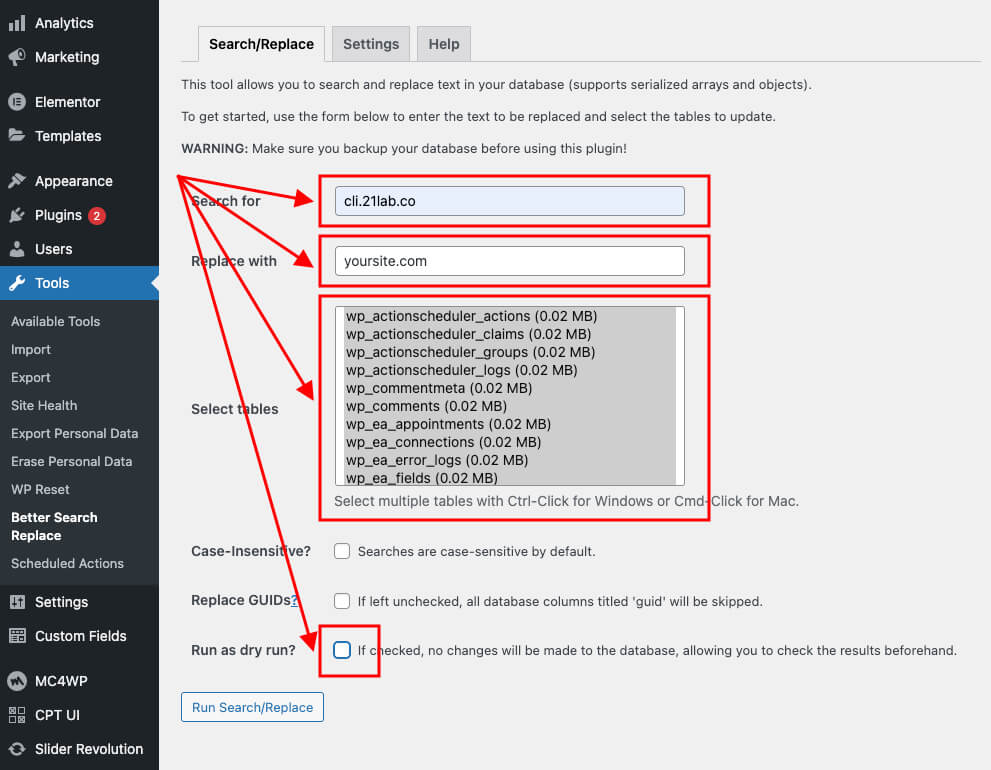
Step 3: Hit Run Search/Replace
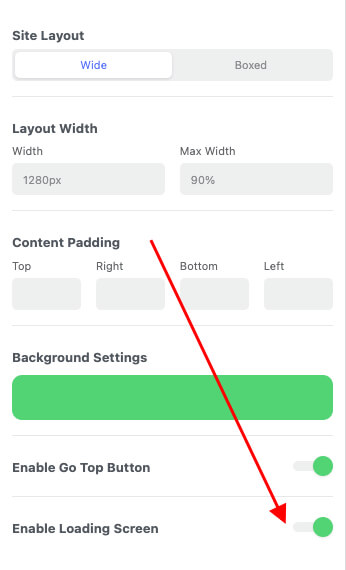
How to Enable Loading Screen?
Navigate to Appearance > Customize > Layout & Styles > Layout Setting then Enable Loading Screen
How to Update Slider Revolution?
We always provide the latest version of Slider Revolutions you can update it by way:
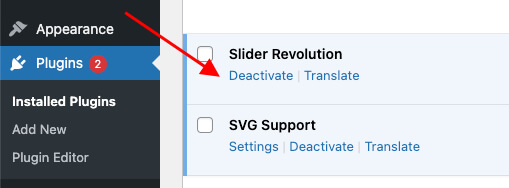
Step 1: Navigate to Plugins > Installed Plugins
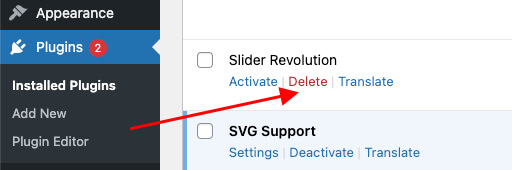
Step 2: Hit Deactivate > Delete
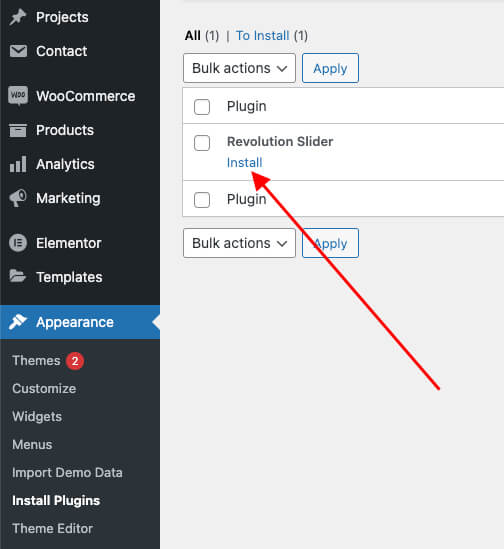
Step 3: Navigate to Appearance > Install Plugins on admin sidebar, then re-install Revolution Slider
Create Social Icons Menu
Navigate to Appearance > Customize > Social Networks
Managing the social networks which will be shown on the website based on the chosen positions.